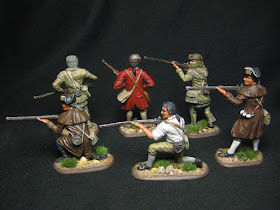
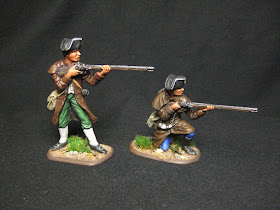
Hi everyone and have a happy and creative new month!
A friend ask me sometime a go to make a tutorial about how I 'm basing my miniatures. I know there are hundreds of tutorials out there about that subject but, I say , why not, I will make one about my "Basing Mud" and it could be useful to someone..
The most common way to simply base your miniatures is to cover the base with PVA glue and then dip it in a cup of sand .The sand will stick on PVA and ..Tadaaa.!, its ready.
One day I think, "How can I do that faster?" . And that's how my "Mud" comes up.
Let's see now how to do that.. It's a very simple way and truly gives very realistic outcomes.
At first , the materials.

1.Two types of sand (one thin and one coarse.)
2.One cup of field soil ( any type or color would do.)
3.Small rocks ( 3-6 mm or even bigger)
4.PVA glue
5.Water
6.A cheap paintbrush
7.A small cup (with airtight cup for storage)
8.A miniature.
Step 1. Mix the two types of sand and the soil in the cup. For smaller scale miniatures (28mm , 1:72, HO etc) add more soil and fewer sand. (Otherwise you will have a rocky ground). Then add water and PVA glue.
Step 2. Stir it up until it forms a nice mud that you can work with the brush. Add water or PVA glue if it is very dry. What you need is the texture of the second picture below.
Step 3. Apply the mud on the miniature's base with the paint brush. You will need some experience with that so the first time use it in a "testing" miniature. It will be applied easily if your brush is very wet.
Step 4. So now you have a small swamp on your base . Don't worry about the extra water. It evaporates and leave only the sand on the base. Now ,while is wet you can add bigger stones on it.
Also you can put other items like bricks , wooden brunches etc..
Step 5. Close the cup with its lid and save the rest for later. The good thing with this mud is that you can make a large amount of it once, and keep it in the cup for long time. I just put a small amount of PVA glue in it , and its ready to use again!
Step 6. Painting. After it dries a bit (about 1 hour) it is a good time to put the first shading. I have a jar of very thin dark brown paint. Give a good shake and apply gently to the base.(Carefully if it is not very dry!!)
Step 7. Dry brushing. When the mud turns dry it will look like this.
Some will say "ready to go!".Yes ,in a simple tabletop standard you could leave it like this . But, it will be much better painted! Dry brush in two lighter tones and turns out to this..
Step 8. Paint the miniature! Sorry but this is the step 1,(haha). I just did it in reverse for the tutorial..
Of course you can do it in this order also , but I find it better to leave the base for the end. Anyway here it is with the painted miniature.
Step. 9 . Finish the miniature with varnish (satin , mat, watever..) and add the vegetation details (If you want to!) or other details as you please..
That's it. A simple tip to make your job faster and have a truly realistic ground in a few minutes (without the drying time!). Using this technique and getting familiar with it you will discover that it is very much easier and cleaner than the common way of PVA and sand, though it is the same thing.
I hope you like it and inspired some one out there!! Thank you for watching!!
Till next time... stay safe and...
Keep Up The Brushes!


